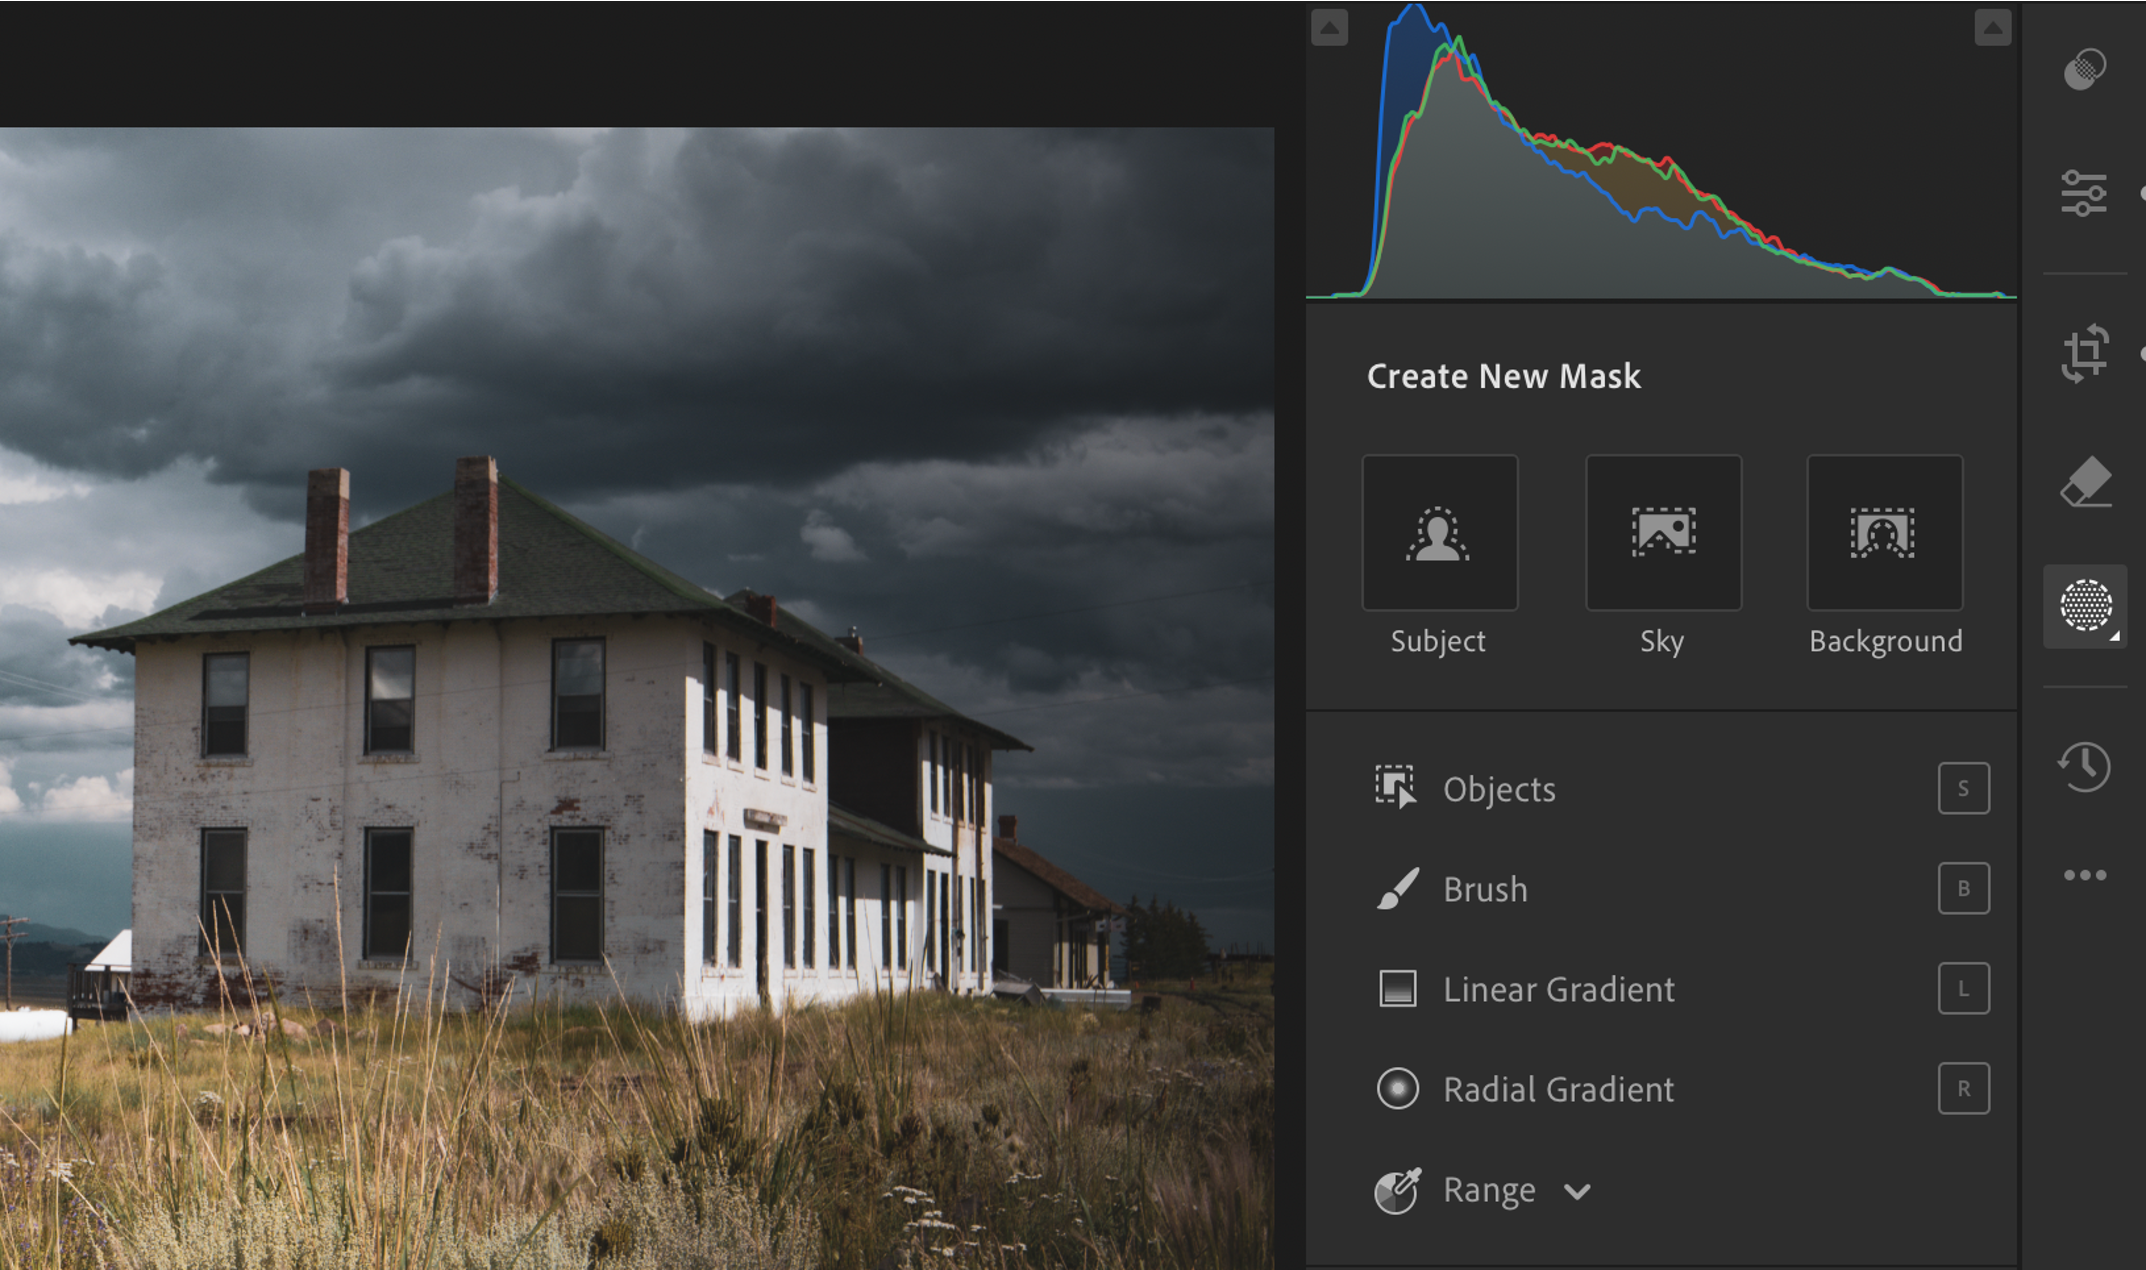
In photography, achieving the perfect balance of light, color, and contrast across an entire image can be challenging. That’s where masks in Adobe Lightroom come in. Masks allow you to apply selective adjustments to specific areas of a photo, offering you precision and control that global adjustments simply can’t match. Whether you’re fine-tuning exposure, enhancing colors, or sharpening details, masks give you the ability to target and edit different parts of an image without affecting the entire photo.
Let’s take a look at the different types of masks available in Lightroom and how they can help elevate your editing process.
1. Brush Mask
The Brush Mask is the most versatile masking tool in Lightroom. It allows you to manually “paint” over specific areas of your image where you want to apply adjustments. This is ideal for fine-tuning localized sections, such as brightening a face in a portrait or adding clarity to certain parts of a landscape.
- When to Use It: The Brush Mask is perfect for precision edits where other masking tools don’t offer enough control. You can adjust the size, feather, and flow of the brush to create smooth transitions between the affected and unaffected areas.
- Example: Imagine wanting to brighten the shadows on a subject’s face without affecting the background. You can use the Brush Mask to target only the facial area and apply exposure adjustments.
2. Radial Gradient Mask
The Radial Gradient Mask is used to create circular or elliptical adjustments that focus on a specific area of your image. This is especially useful for drawing attention to a subject or for creating a vignette effect around the edges of a photo.
- When to Use It: Use the Radial Gradient Mask when you want to emphasize a particular subject by subtly darkening or brightening the surrounding areas. You can control the feathering for soft or hard edges.
- Example: In a portrait, applying a Radial Gradient Mask around the subject can help make them pop by darkening the edges of the frame, drawing the viewer’s eye to the person.
3. Linear Gradient Mask
The Linear Gradient Mask allows you to apply adjustments gradually across your photo in a straight line. It’s ideal for landscapes, where you may want to adjust exposure for just the sky or enhance details in the foreground.
- When to Use It: This mask is great for balancing light between different parts of the image, such as brightening a dark foreground or adding contrast to a blown-out sky.
- Example: In a landscape shot with a bright sky and dark ground, a Linear Gradient Mask can be used to darken the sky without affecting the foreground, or vice versa.
4. Luminance Range Mask
The Luminance Range Mask lets you select areas of an image based on their brightness. This mask is particularly useful when you want to adjust highlights, shadows, or midtones without impacting other parts of the image.
- When to Use It: Use the Luminance Range Mask when your image has high contrast, and you need to isolate bright or dark areas for fine-tuned adjustments.
- Example: If your photo has overexposed highlights in the sky, the Luminance Range Mask can help you target just those bright areas to reduce exposure, without affecting the rest of the photo.
5. Color Range Mask
The Color Range Mask allows you to select and adjust specific colors in your image. This mask is ideal for situations where you want to enhance or correct particular hues without altering other colors.
- When to Use It: The Color Range Mask is particularly useful for boosting or desaturating colors selectively. You can target a specific color in your image and adjust its hue, saturation, or brightness.
- Example: If you want to enhance the blue of the sky while leaving the green trees untouched, the Color Range Mask can help you isolate the blue tones for targeted adjustments.
6. AI-Powered Masks: Select Sky and Select Subject
Lightroom’s AI-powered masks, such as Select Sky and Select Subject, use machine learning to automatically detect and select specific parts of your image. These masks save time by automatically creating precise selections, making it easier to apply adjustments without manual painting.
- Select Sky: Automatically selects the sky in your image, allowing you to adjust its exposure, color, and contrast without affecting the landscape.
- Select Subject: Automatically isolates the subject in your photo, perfect for portraits or product photography where you want to make adjustments to the subject without impacting the background.
- Example: In a portrait, you can use Select Subject to brighten the subject’s face and make them stand out, or use Select Sky in a landscape to adjust the sky’s brightness and color.
7. Intersecting and Combining Masks
One of Lightroom’s most powerful features is the ability to combine and intersect masks. This feature allows you to fine-tune your edits even further by applying one mask on top of another. For example, you can use the Select Sky mask, and then intersect it with a Luminance Range Mask to target only the bright parts of the sky, ensuring the most precise edits possible.
- When to Use It: Combining masks is ideal for complex scenes where multiple adjustments are needed. By combining masks, you can apply different types of adjustments to specific parts of your image for a more polished result.
- Example: In a landscape photo, you could apply a Linear Gradient Mask to adjust the foreground, then use a Select Sky mask to adjust the sky, and intersect it with a Color Range Mask to adjust only the blue tones in the sky.
Conclusion: Elevate Your Edits with Masks
Lightroom’s masking tools offer unparalleled control over your photo editing. By using masks to target specific areas of your image, you can make more precise adjustments, enhance details, and create a professional-quality result. Whether you’re working with portraits, landscapes, or anything in between, mastering masks is essential for taking your photo editing to the next level.
Explore each of these masks in Lightroom, experiment with combinations, and see how they can transform your photography. Whether you’re a beginner or an advanced user, Lightroom’s masks are a game-changer in achieving perfect, polished photos.
